![Revolution Arena [English Version]](https://revolutionarena.com/english/wp-content/uploads/sites/4/2024/07/Revolution-Arena-ISSN-2966-2117.png)
 – Part 01")
Hollow Knight – Complete Walkthrough (Step by Step Guide) – Part 01
April 20, 2024| Release date : February 24, 2017 Players : 01 player Genre : Metroidvania Developer by: Team Cherry Languages : German, Simplified Chinese, Korean, Spanish, French, English, Italian, Japanese, Portuguese, Russian. Platforms : Nintendo Switch, PC – Computer (Mac, Windows and Linux), Playstation 4 and Xbox One. |
Hollow Knight is an indie metroidvania released in 2017 by Team Cherry, the game has a very subjective, dark and melancholic story in which an unnamed knight needs to free the Kingdom of Hallownest, inhabited by insects, from the infection caused by an unknown God.
Take advantage and read our review of Hollow Knight, click here !!
But let’s not beat around the bush, well, if you’re here it’s because you already know the game, so check out the complete walkthrough (Step by step guide) of Hollow Knight below.
Hollow Knight Complete Walkthrough (Step by Step Guide)
The Journey to Dirtmouth
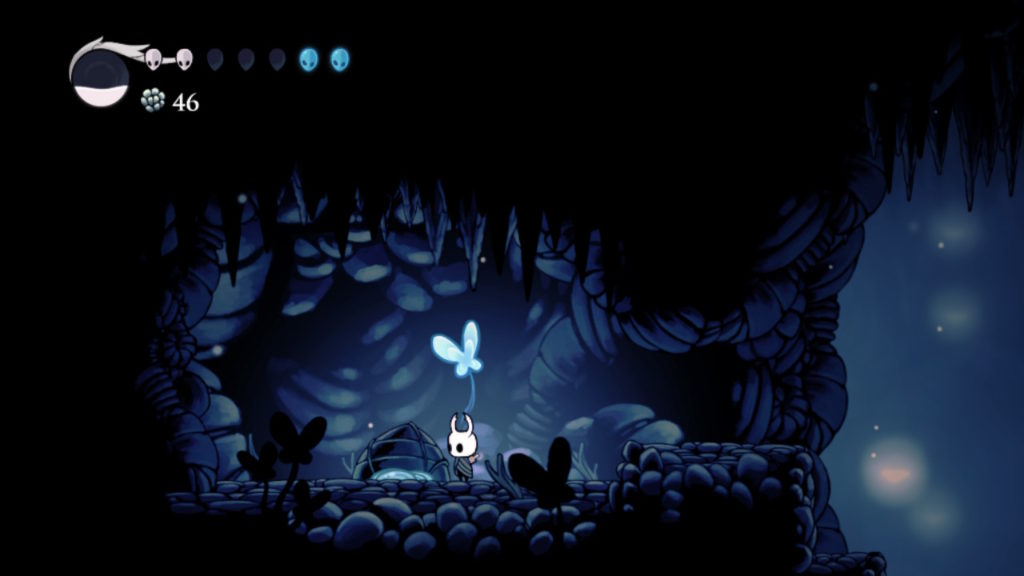
After you take control of the character, go straight, destroying all the insects on the way, to accumulate geo (you will understand why later), when you reach the end with no exit there will be a geo stone, hit it to get more geo and continue climbing the high rocks.
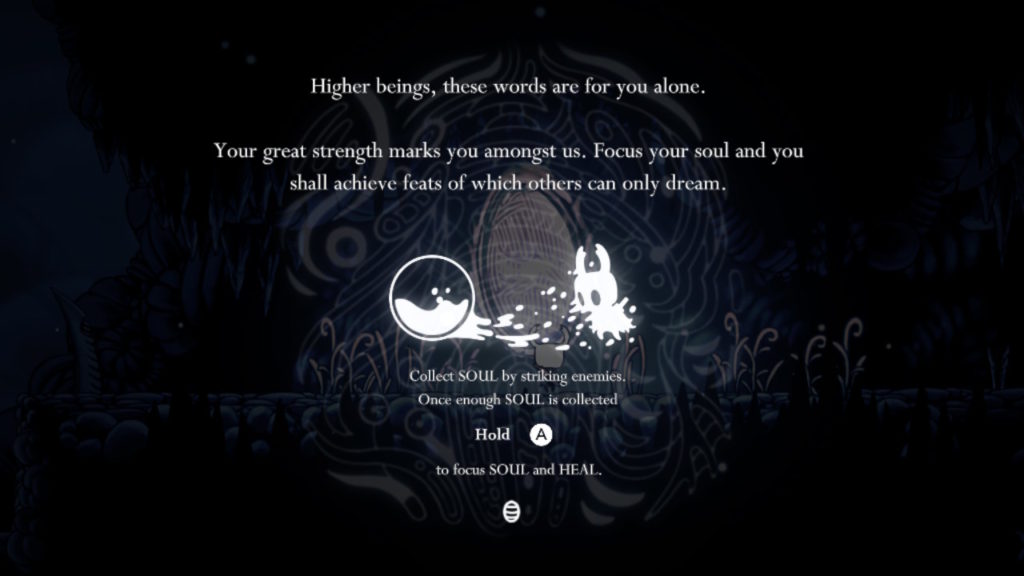
Once you get up there, continue the path to the left and you will find a mini tutorial about your soul, recover soul by hitting enemies and once you have enough soul press “B” to heal”.
A little after the mini tutorial, you will find more elevated platforms that will guide you to the “Lifeblood room”
#TIP (geo stone) : there is a geo stone on the left, before climbing the platforms, continue left and you will find a door, break it and climb the platforms in this new room, defeat the insect and you will find the stone up there.

At the end of the climb, go left to find the “blue lifeblood egg”, attack it to gain a temporary life boost, after destroying this egg, continue right, until a part where the floor will break, but be careful! Here there is a hidden geo stone and a secret room, if you want to skip this part, ignore the next tips.
#TIP (geo stone): to get this stone, you will have to hold left while your character falls, as there is a passage in the wall that leads to the geo stone.
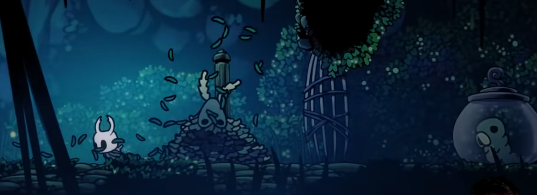
The floor will break and your character will fall, but relax nothing serious will happen hahah just continue the path jumping across the platforms and at the end go up until you find a “dead end” place, just break the wooden beams that support that part of the ceiling until he falls. Here, the left path will take you to where you fell when the ground broke, so take the right where there will be another inspection, at the end there will be a large gate, break it and follow it until you fall again, keep walking straight and you will arrive in Dirtmouth, the fading town.
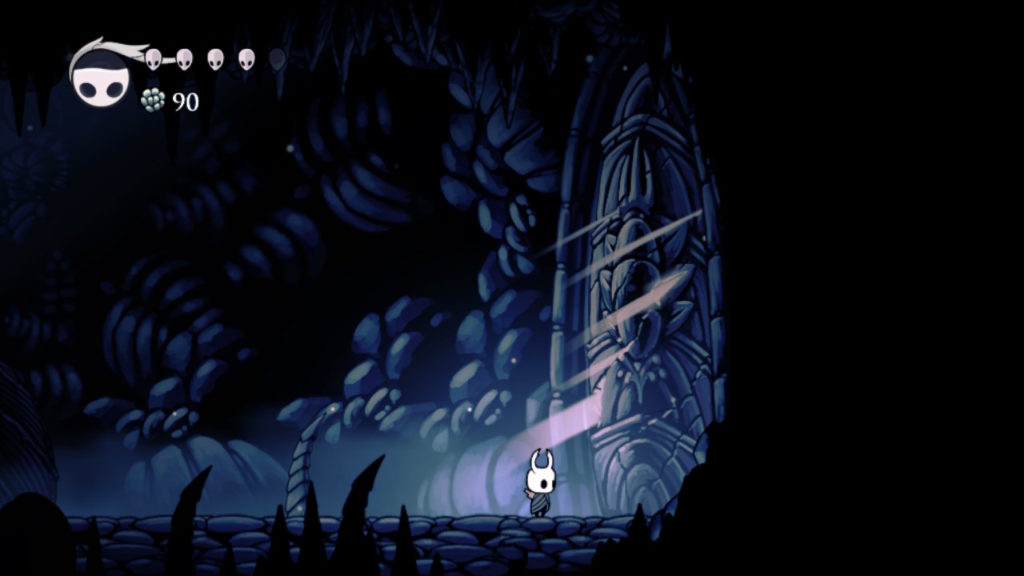
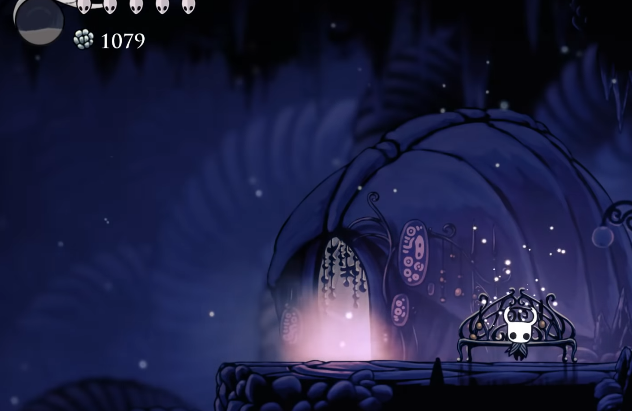
Dirtmouth:
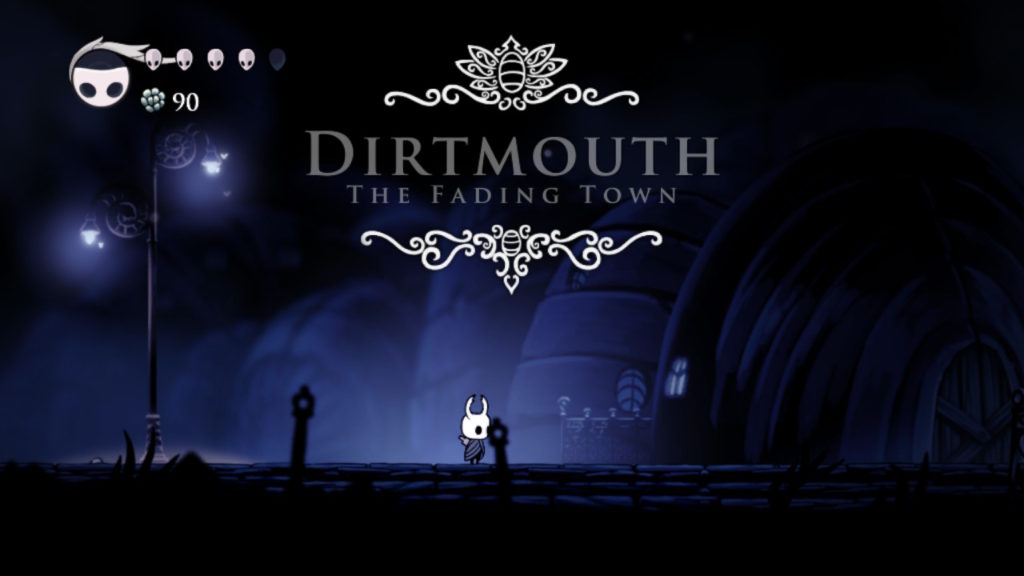
In Dirtmouth the ancient insect will tell you a little more about the history of Hallownest, after talking to him, sit on the bench and do the game checkpoint, the benches will serve as healing points.
Continuing to the right you will notice that there are several stores, but they are closed at the moment so there is not much to do, just go straight and go down the well that will appear right in front.
Forgotten Crossroads:
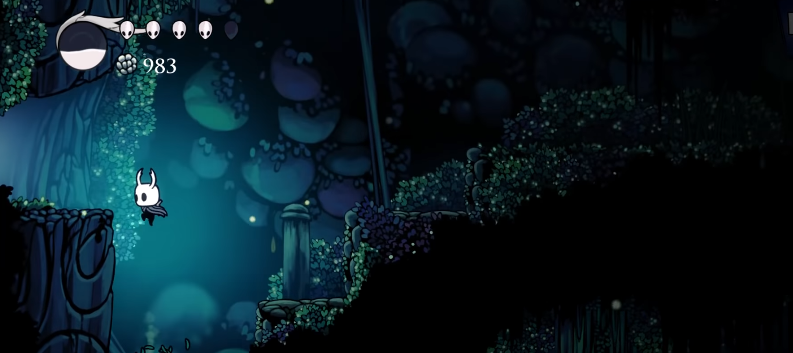
The forgotten crossroads is a huge maze that will make you get lost several times, especially since we started without a map, so our initial objective will be to find the cartographer who will give us the map, make sure you added geo on the way as it will charge 30 coins
#TIP (Geo stone): as soon as you go left when you fall from the dirtmouth pit, there will be a descent going to the right, there you will find an enemy and behind him the stone.
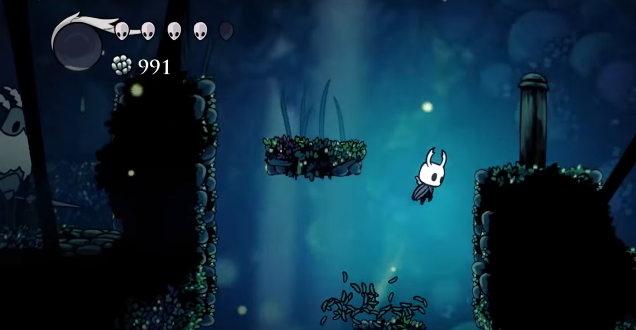
Find the cartographer : after falling into the well in Dirtmouth, take the left path until you reach a place full of elevated platforms, there will be several paths, but to find the npc we need to go down these platforms, to the hole in the floor, jump into the hole and on your right will be the cartographer, who will sell you the map, in addition he will tell you about his wife Iselda who runs the shop in Dirtmouth (if you go up again, you will see that there is a shop open now) and will suggest you buy a compass.
Now you have the map, but you can’t understand it very well without the compass as it doesn’t tell you where we are, so I suggest you collect 220 geos and buy the compass at Iselda’s store, there will be other accessories that can be very useful. useful, at first I recommend buying the compass, the pen (120 geos) and the pin that says where there are checkpoint banks on the map (100).
Well, the things I’m going to list below don’t need to be done in any order, I’m going to describe how to get to the locations from the beginning of the forgotten crossroads, it’s important that you explore the maze a little, so you can get a better position and collect coins by killing the insects.

The room with the melancholic Larva who lost her children : remember the floating platforms? Well, to the left of it there will be some entrances, take the first one and in that room you will find a larva that lost its children, they are scattered throughout the game and every time you release one and return to this room the father will throw geos to you. you!
Larva 1 : take the exit down and to the left from where you found the cartographer, you will enter a room with some toothy animals that come out of the floor, avoid them and continue left, in the next room be careful with a species of acid and the orange bubble insect, defeat it as soon as possible as it spawns mini versions of itself, at the end of this room, at the top, there will be one of the larvae to be rescued.
#TIP (geo stone): in the room with the worms full of teeth there will be a rock that you can’t reach by jumping, to get there you will need to get momentum on the worm and to do this you jump and attack downwards when the animal is All out, this process can be a little frustrating if you’ve just started playing.
Hot spring water: starting from the beginning of the crossroads, take the path to the left until you reach the part that has several elevated platforms, go down these platforms, the same path you used to find cornifer, once there, jump into the hole in the floor next to it of cornifer and take the path to the right, until you see a sign with a drawing of a Boss (be careful there will be 3 insects that breathe fire in the next room, about 4 hits on each should do the trick), climbing up the elevated platforms in this room you will see a lit entrance, there is a type of water that heals your soul and a bench for you to heal your life.
Mini boss (good for geo farming): arriving at the lost crossroads, take the right path, defeat the enemies and follow, you will pass by the black egg temple, keep going straight until you reach a part with two paths, one going down and one Going up, take the upper path and further ahead you will find a mini boss with a kind of club, the trick here is to hit and run to avoid taking damage, you hit once and escape his attack, do this several times until kill him, this mini boss also has an attack in which he jumps on the ground and a wave goes towards him, there’s not much of a secret just jump over the wave that is safe!
Larva 2: go straight to the right after killing the mini Boss I mentioned above, at the end of the room there will be a larva to rescue.
Sly: this NPC is right below the mother fly, after defeating her jump and go to the left, on the way you will find an entrance and there will be Sly, talk to him and when you go to dirtmouth again Sly’s shop will be open
Larva 3: Coming down from the well in Dirtmouth, take the right path at the lost crossroads, go past the black egg temple, go straight until the path splits up and down, take the path going down, down you go Note that on your right is the mine, but we want to take the path to the left, in the next room, there will be two insects and an exit on the floor, jump into that hole, continue going down, until you see a beetle, the wall below the place that This beetle’s can be broken and there you will find the third larva!
The last beetle: this beetle serves as fast travel, remember the path to larva 3 that I told you about above? The last beetle is just below! After catching the larva, continue going down until you see a sign with the image of the animal indicating a half-lit entrance, take this path, you will see a bench and further ahead there will be a bell, you need 50 coins to be able to use it , give the geos and ring the bell, the beetle will come running and that’s it, you’ve unlocked fast travel, at this point in the game we can only go back to dirtmouth, but later there will be other areas available.
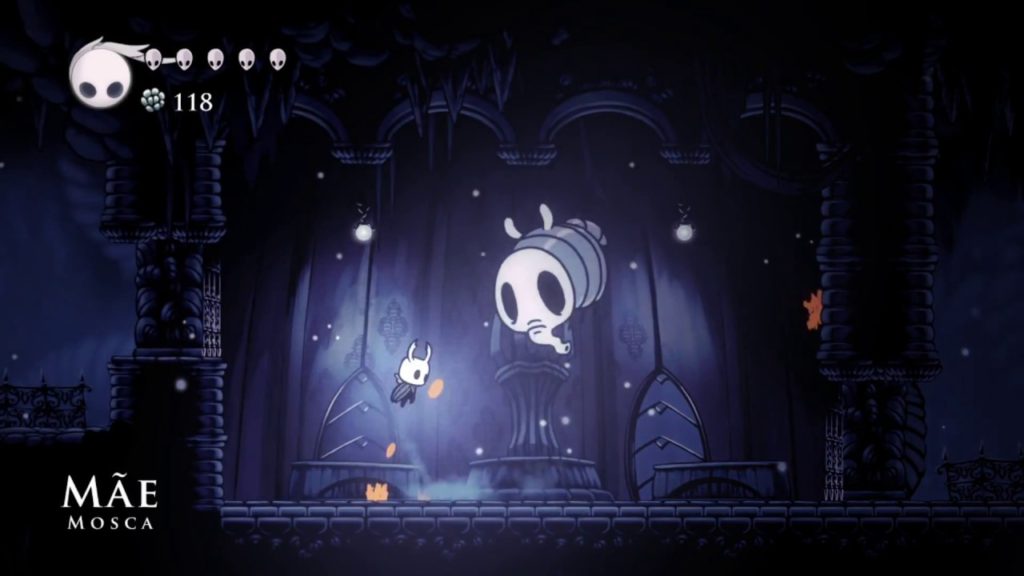
Mother fly: to get to the mother fly, go to where we found the last beetle, from fast travel, but instead of going where the beetle is, go down and fall into the hole in the floor, keep going down and going right, you will find those animals with an orange bubble, go down to the end of this room and continue to the right, at the end you will find the mother fly, the door will close and will only open after you defeat the enemy.
To defeat the mother fly it’s simple, just give as many hits as possible and dodge its attacks, as for a few moments it will be throwing itself on the ground very quickly, in the last hit the mother fly will explode releasing geos, but it’s not over yet! little flies will come out of your belly, kill them and the path should open up!
#TIP (Geo Stones): starting from the cartographer Cornifer, jump to the exit on the floor and take the right, arriving in the next room there will be elevated platforms, climb them and up there you will find 3 stones to farm geo, on the stone which is not on the ceiling, there is a false wall, break it to find another geo stone.
The False Knight : The strategy to defeat the Boss here at Encruzilhada Perdido is as follows, you have to attack him from behind, his first attack will be to jump and land in the place you were with that kind of hammer he uses, so you must run to get behind him when he falls and attack his back. Another of his attacks is that wave of damage, just like the other mini bosses we did before getting to him, skip the wave to avoid taking damage and try to attack him between the boss’s actions. At a certain point your damage to the False Knight will be so much that he will fall to the ground without his helmet, run to attack as much as you can on his unprotected head. After that, some fireballs will start falling from the ceiling, but this doesn’t change the battle much, just dodge and repeat the actions I said until he is completely defeated.
After defeating the Boss, open the chest to gain geos and go left, now we will gain a new ability, at the end of the corridor, you will have the option to move forward or go up, to get this ability, go up following the torches.
Up there, you will find an entrance that leads to the Ancestral Mound, enter and straight away you will see a bench, if you need it, heal on the bench and then talk to the NPC, shaman.
Getting the “Vengeful Spirit: When talking to Shaman, the snail will give you a gift, a spell that he himself created, after receiving the spell, you will faint and wake up trapped by a door, Shaman then asks you for a favor in return of magic, follow the dungeon path to find the enemy that the NPC asked you to defeat.
The enemy: Arriving at the end, you will find the enemy that Shaman was talking about, it looks like a blue armadillo hahah, to defeat it, use the new magic, the vengeful spirit from afar, because if you get too close the animal will close in and not take you away. damage, so keep using magic from afar and defeating the animals he throws, I believe that with 4 or 5 hits from the vengeful soul he dies.
Soul catcher: After defeating that enemy, don’t break the ground and continue straight to get the soul catcher, this amulet will allow you to attract more souls when defeating enemies.
Now that we’ve finished everything, break the ground to find Shaman again, talk to him and he will release you, if you want, equip the amulet on the bench.
The Journey to Greenpath
Leaving the place where you found the Shaman, take the right, get off the platforms and continue along the path on the right. You will reach the place where we first met the cartographer, he will no longer be there. Go up until you reach the area with several platforms, flies and animals, the one with several side entrances.
Here we will take the entrance on the left which has some blue lights and plants, on this path you will find another enemy like the one defeated in the Shaman area.
Defeat him in the same way and follow the path to the right, and we finally arrive at the second Hollow Knight area, the Green Path.
Greenpath
As soon as we defeat the enemy that blocked the path, go straight to the left, avoiding falling into the green water as it causes damage, we will also find some enemies that release a type of orange poison, with each hit given, move away, as it releases a Poison smoke, when he dies he explodes releasing more poison so the ideal is to hit and dodge until he dies.
Also be careful with the enemies that camouflage themselves in the grass, pay close attention as they appear out of nowhere and are very difficult to notice.
#TIP (Geo Stone): In a certain part of the path you will see a corridor with some buildings (photo) climb the platforms until you reach a dead end, hit the wall to break it and there will be a geo stone, Be careful because there is a carnivorous plant on the ground, to kill it, dodge when it closes and hit it twice.
Bench: Continue heading left, along the top path until you pass through a transition, where the area is wider, climb the platforms and there will be a bench at the top.
After getting the bench, go down and keep going left, you will notice another character running away from you, but we won’t do anything about that now.
#TIP (Geo stone): After seeing this other character, go down and enter a passage to the right, where there will be a mosquito, be careful, his attack is very fast, at the end you will find the geos stone.
Before going after the character on the left path, we will go down, either to the left or right, both paths lead to the same corner.
Cornifer: On the way to the right, notice that there are platforms held by plants, cut these plants so that the platforms fall, follow the path to the right until you reach a platform that is too high to be cut, here we will go up to go around, Up there, remember to release all the platforms so you don’t fall into the spikes below. At this point you should already hear the cornifer “singing”, we are almost there! Go down until you find the spikes, there will be a path to the right, follow it and you will find Cornifer! He will offer you a map of the area for 60 geos.
Tip: Follow the pieces of paper left on the floor to find it.
Larva: In the area before finding The Cornifer, there is a hidden platform that needs to be released to get this larva, this passage is up in the far right corner, just after a hanging platform. Enter the place and knock to make it come loose. After that, just move to the area where Cornifer is located, the larva is up there waiting to be released.
In the room to the left of Cornifer, after passing through the spikes, fall into the hole that is lit.
The Hunter’s Diary
The Hunter: after going down through the hole, follow the only possible path until you reach a place where you can go down to the left or up to the right, the path on the right has some kind of teeth coming out of the ground, that’s where the Hunter is! Follow this path with your teeth and at the end you will find him, talk to him and receive his diary, with this item we can learn more about the creatures in the game!
Then go back the way you came and now go down to the left where you will find those statues that give you soul and on the left wall there will be a geos stone.
Larva: Continue down the platforms above the toxic water, at the bottom, on the right, go through the spikes using the jump and hit down technique and at the end you will find another larva to be saved.
After saving her, go back the way you came and now we will take the remaining path, to the left at the bottom, where there is the toxic water.
Now, go down to where there is the volatile mosquito (the one that explodes orange smoke), to the left of it there is a secret passage.
After inspecting what’s in that secret passage, go back and fall into the hole, on the path to the left you’ll find a bench, a little different, but it does the same thing as the others, so heal up and update your map.
Now, it’s basically a straight left, notice that on your map in the upper left corner there is a big symbol, that’s where we will have the fight with the Boss, which in this case is the Hornet.
Note that as you progress to the left, she appears running away, follow her to a point where she stands, climb up behind as well.
Bank: Up there, notice that there is a kind of post to inspect, pay the 50 geos and the bank will be released on the right, heal and update your map.
Keep climbing…
Secret passage: during the climb, when you find a volatile insect, on the left side of the platforms, you will have a secret passage
Let’s continue going up and killing the insects until we reach a part where you can only follow the path to the right, go up and go left. Let’s find a lit opening in the ceiling, go up there.
Arriving in the new room, going up we will find something to inspect, as there is no way out, go back.
Now we have two paths, the left and the right, we can’t go very far along the left path now, note that we need to knock down the platform on the other side, so let’s take the right path.
On the direct, we will face a new type of enemy, he is half hidden in a pile of leaves, but is easy to notice.
To kill him, the best way is to wait for him to attack, at this time he lets his shield guard down, potentially taking damage, you can also at these moments use the vengeful spirit by pressing A.
After that, keep going straight to the right and following the only possible path, in a moment it will go up to another illuminated opening in the ceiling, go up there too.
Ceiling insect: After climbing through the hole in the ceiling, on the left you will see an insect coming out of the ceiling holding an NPC in its mouth. Just attack with one hit and he will release the NPC and start combat with you. He can be a bit annoying with his quick attacks, I recommend dodging and trying to get him in the air as much as you can, using the vengeful spirit as well.
Zote the mighty: After defeating the giant insect, talk to the NPC, his name is Zote and he will immediately complain about why you bothered him with his prey hahah.
After talking to Zote, take the left and go down through the lit hole in the floor, now go right along the upper path and you will find something to inspect.
After that, take the path underneath until you enter a room with another one of those animals that hide in a pile of leaves.
Larva: Kill the animal and behind it, iron bars will be released, making it possible to save the larva.
As there is no exit after the larva, go back and go down taking the path on the right where you will see a suspended platform, cut the wire and go right, notice that we will exit there at the beginning, where I told you we would need to go around to release the platform.
Well, since we already know where it’s going, go back to where we arrived with the suspended platform and let’s go left now that it’s possible. At a certain point, you will find the fast travel beetle sign.
Fast Travel: Fall into the hole and going down the platforms you will see a lit path on the left, as well as a sign indicating the beetle, it is in the next room on the left, as well as a bench that allows us to heal and update the map.
Going back the way we came before falling into the hole, a little higher on the left is the fight with the Hornet,
But if you want to guarantee more geos, before the fight and recover your soul, instead of going in, continue along the path to the right, remembering to be careful with that animal that runs in a bush, after passing through it, climb the platforms and see that on the left there is that enemy that defends with the shield and that was hidden in a pile of leaves
Fight him, but be careful, at the end there is another one hidden in the leaves, if you don’t get close he won’t attack so it’s easier to fight one at a time, after defeating them both, get the geos on the three rocks at the end.
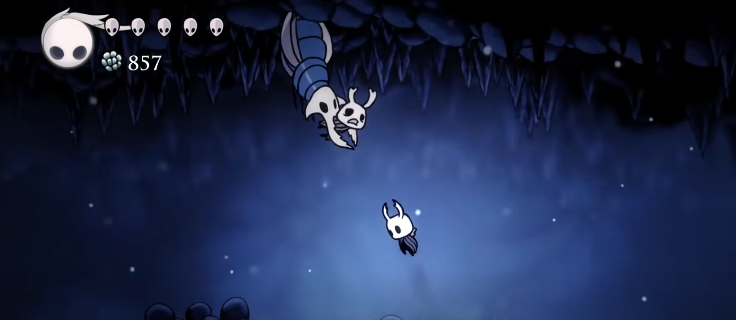
Hornet
Now it’s time to fight the Greenpath Boss, the Hornet, who you saw running away a few times during the game.
To find it, just enter the illuminated path on the left above the entrance to the fast travel.
After entering, just go straight and at the end you will find it. The battle against the Hornet is intense, but with these tips, you will find the right balance between attack and defense, knowing when to get close, when to jump over it and when to use your spells. Keep an eye on her attack patterns, and with a little practice, you’ll do well. Good luck, you can do it!
The best way in this fight is to wait for her to attack, dodging and attacking immediately afterwards, being careful as at times she attacks by throwing her spear which returns to your hands. The important thing is to be patient, as it takes a few hits to defeat.
The Hornet is an agile opponent and its varied attacks can be a challenge. But don’t worry, with the right strategy, you will succeed!
The Hornet has four attack types, and understanding each of them is key to defeating it. Let’s detail:
- Simple Needle Attack : The Hornet will launch itself towards you, both on the ground and in the air, trying to hit you with its needle. This movement is fast, but with a little attention, you will be able to dodge it.
- Area Attack (AoE) : She performs an attack that affects an area around her. You will realize that when she prepares to move, it is time to move away!
- Needle Throw : This is perhaps the Hornet’s most insidious attack. She throws the needle towards her and then pulls it back. The difficulty here is predicting whether she’s going to do a simple attack or this throw, especially if you’re a little far away.
Now, how to deal with these attacks? Here are some valuable tips:
- Stay Close, But Not Too Close : Staying relatively close to the Hornet is a good idea, as it gives you the mobility to jump over her and attack from above when she prepares for a simple attack. But be careful not to get so close that you can’t escape her area attack.
- Beware of Needle Throws : If you are far away, the risk of being caught by the needle throw increases. If you predict wrongly and think a simple attack is coming, you will end up taking a hit. So, the secret is to balance the distance.
- Focus on Not Focusing : It may seem strange, but avoid trying to focus to heal during the fight. Hornet’s attacks are too fast and she will probably hit you while you are trying to heal. The only safe time to try and focus is when she’s recovering energy after you hit her a few times.
- Use Your Soul Wisely : Instead of focusing, use your soul to attack the Hornet with the Vengeful Spirit spell. This will deal good damage and help you maintain a safe distance at the right times.
After being defeated, the Hornet will run away and you will now be able to get a new ability, the moth wing cloak
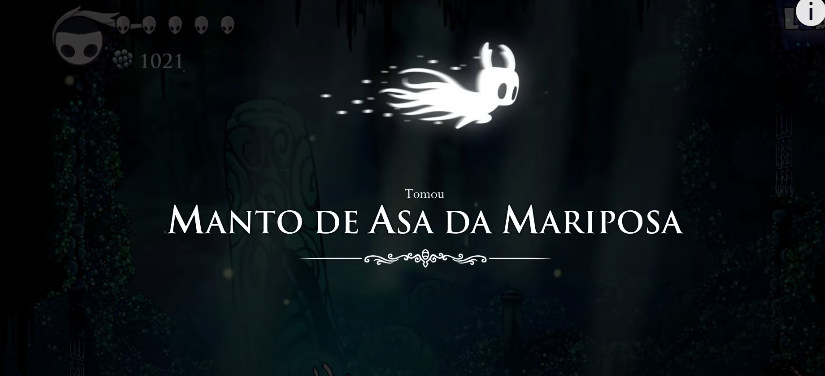
With this ability we can explore more areas of the game.
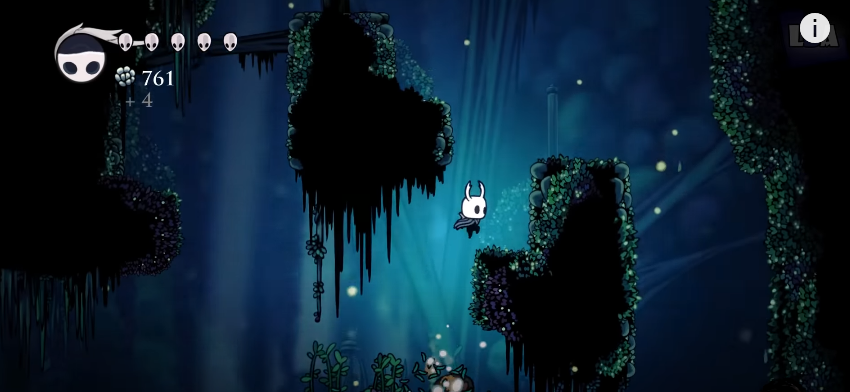
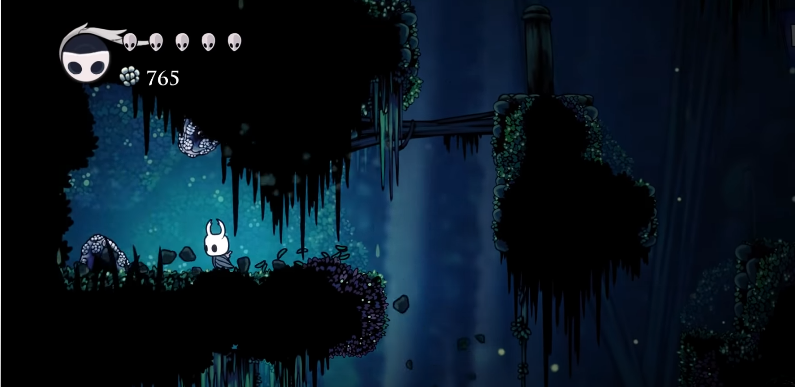
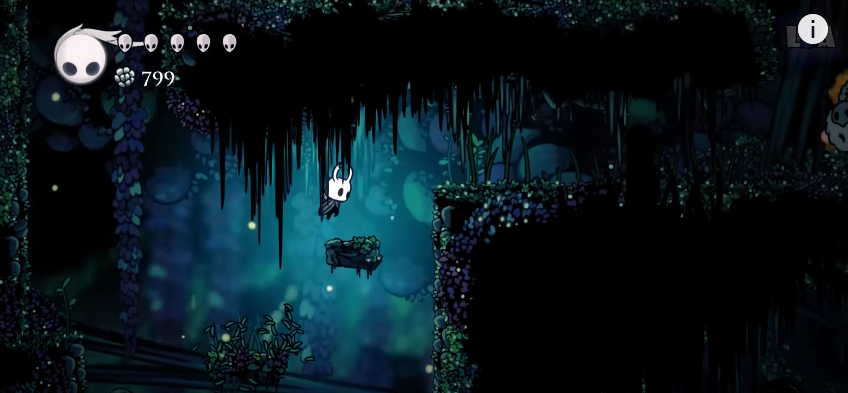
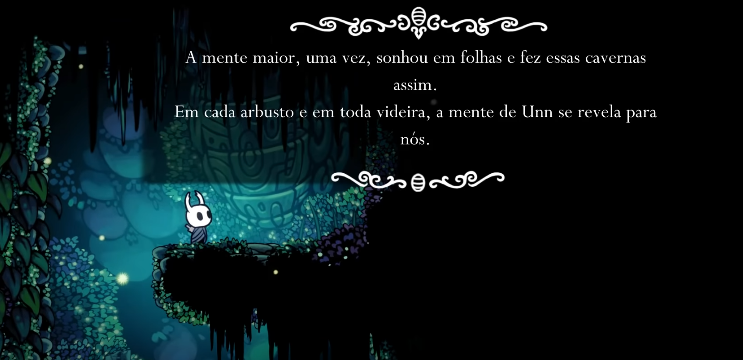
Lake of Unn: After obtaining the ability, take the path to the left and go down until you reach the toxic water that causes damage, with the dash you can access the areas further to the left.
Go straight left until you find Unn’s lake, enter the place and use the bench to heal yourself if necessary and update the map.
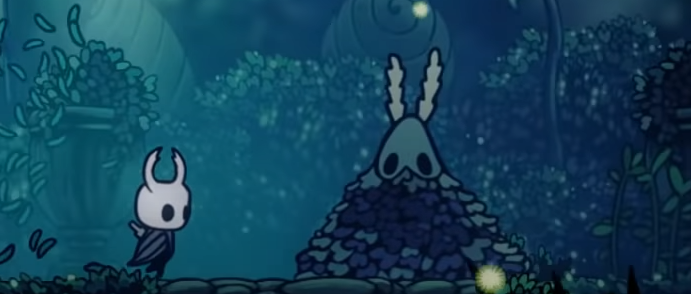
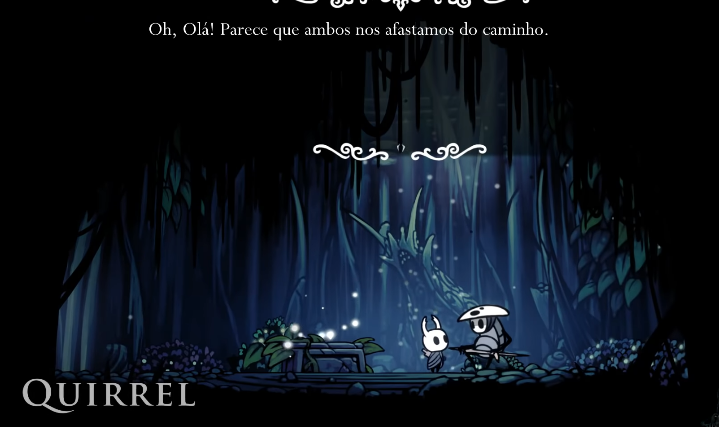
There we will also find Quirrel, an NPC. During the game you will be able to find Quirrel at various times, if you find him other times throughout the game, you will be awarded the “Witness” achievement. Now you must go back a little to get the Thorns of Agony spell.
Salubra: Another location that we can access with Dash is the NPC Salubra’s store, which is located after the area where the mother fly is located, which previously was too high to be reached with a normal jump, but now with the new ability we have access to more a bank and this store.
In this store, the most interesting thing is the amulet fittings, which allow us to carry more.
Let’s go back to the Stag Station entrance, but this time, let’s go down. If by any chance you haven’t activated the lever yet (it really is, it was supposed to be a lever, but let’s keep the immersion going, right?), now is the time. Activate it to open the path below. Next to this, you will find a Geo rock on the left – don’t miss it, mine it to collect the gems. After doing this, prepare for a small fall, as we’re going down to the next screen.
When you get there, don’t take too long; our objective is to the right side. Go there and, on the next screen, get ready to go up. Here, my friend, the path starts to get a little challenging. You will need to navigate a somewhat intricate path to cross to the other side. But oh, the reward is worth it: on the other side, you’ll be able to get the Thorns of Agony enchantment. Not bad, huh?
Now, with this treasure in hand, our next destination is a place known as the Fungal Wastes. But first, we have to cross Fog Canyon. Remember we went there before? It will be peaceful, you’ll see.
To get there, the strategy is simple: fall straight down, staying close to the walls on the right side. The enemies in this area are mostly passive. They won’t actively come after you, which is a relief. However, be careful with the big guy, Ooma. If you end up defeating him, the core will explode, and sometimes, that explosion can come your way. So keep your distance or be prepared to dodge if necessary.
After passing through another screen, we arrive: Estação da Rainha (Queen’s Station).
 – Complete Walkthrough (Step by Step Guide)")
Facebook Comments