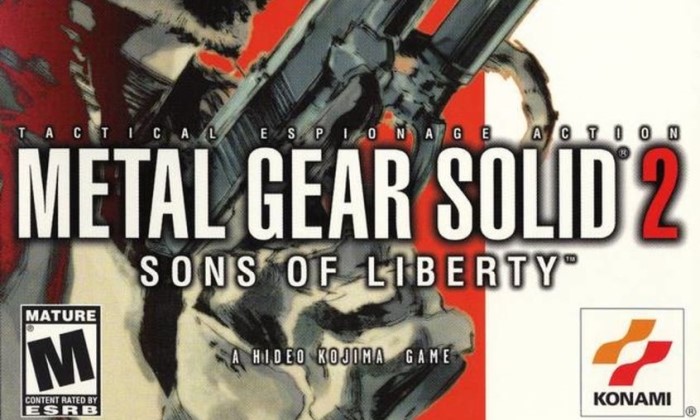
Metal Gear Solid 2: Sons of Liberty – Complete Walkthrough (Step by Step Guide)
January 30, 2024By: Roger Henrique
TANKER
After listening to all of Otacon’s instructions and tips, investigate the deck to find items. Be careful with the guards and use tranquilizer darts so they don’t bother you. You can throw them off the ship if you feel necessary. On the right side of the ship, turn the valve on the door to open it. Search the area and go up to Deck E, The Bridge. You will meet Olga Gurlukovich and you will have to face her. Take cover behind the boxes and shoot her when the opportunity arises. Stay alert and run to escape the grenades. When Olga uses the tarp as camouflage, shoot through the fabric to hit her. If the light from the reflector is compromising your aim, destroy the reflector with shots. Climb up the mast and get the thermal goggles. Behind the boxes you will find the wet box. Return to Deck A, avoid the guards and go down to the Eguine Roon. There are many guards in the area, the best thing to do is use the M9 weapon to take them out of action. Climb the stairs to the room where laser beam sensors protect the exit. To deactivate them, use the USP weapon and destroy the devices indicated by a green light. The first one is on the left, behind the explosive; the second is on the right, on the wall; the third is on the right, at the top. Eliminate enemies throughout the corridor and use the boxes as protection. Arriving at Hold, walk stealthily so as not to attract attention. Use the M9 weapon on the guard in the path and go around the left corner to the door. Look left and find a trapdoor. Open it and continue crawling through the duct to the next wing – orient yourself using the radar. Your objective is to take the following photos of Metal Gear Ray: the logo written “Marines”, the front part of the machine, the right side and the left side of the robot. Once done, examine the computer in the corner of the area to send the photos to Otacon. Then just enjoy the beautiful animation.
PLANT
Pay attention! Two years have passed since the incident on the ship. The plot changes radically and Snake stops acting as the protagonist. Now Raiden is the secret agent. Your mission is to rescue the American president and eliminate the terrorist threat led by Solid Snake. Did you find it strange? Well, wait for more stunning revelations… After the chat, go ahead and examine a panel to activate the radar and enter your data. For the elevator to work, wait until the alarm deactivates. Crouch through the hole in the grate and go to Struct F. In the Werehouse, go into the corner room and get the M9 gun. Run to Struct B and get ready to watch the bloody scene with Vamp, one of the terrorists. Go to Struct C and receive the items card LV1, coolant and sensor A from Peter Stillman, the bomb disposal agent. Your new mission will be to find several bombs and deactivate them using the freezing gas from the coolant. Use sensor A to make the bombs appear on the radar. Check the locations of each of the explosives:
Bomb1: in Struct C, above the mirrors in the women’s bathroom.
Bomb2: In Struct B, in the Transformer Room, look behind the generator door.
Pump3: in Struct A, in the engine room. Go under the red pipe.
Bomb4: In Struct F, hang from the railing on the second floor and fall onto the boxes.
Bomb5: in Struct E, on the helipad, search under the plane.
Bomb6: in Struct D, on the lower floor, follow the signals and open the trapdoor.
Go back to Struct C and get sensor B. You have 400 seconds to get to Struct A and deactivate a bomb. Once there, go down the elevator and freeze the bomb that is under the suspended vehicle. Get ready to face Fortune, one of the most powerful members of the terrorist group. You can’t defeat her, so just worry about buying time and staying alive. Run to Struct E, go up to the helipad, freeze the bomb on the ground and face Fatman, the fat man responsible for installing the bombs. Your priority is to freeze the armed bombs. When you don’t find bombs, run after the enemy and knock him down using the spinning strike (X button). When he’s down, draw the USP weapon and hit him in the head. You can take him down by planting claymores in the ground. After being defeated, Fatman activates the last and even more powerful bomb. However, he does not reveal her whereabouts and dies afterwards. Guess what, she’s underneath him, drag her body so you can freeze the bomb. Receive card LV2, phone and DBU items from the mysterious ninja. Go to Struct F, open the rooms with access to level 2 and find the AKS-7U and M4 weapons. Head to Shell Core 1. Equip the DBU and AKS-7U weapon to disguise yourself. Do not make suspicious movements to avoid attracting the attention of the guards. Use the elevator and go to floor B2, where you will find the d.mic item next to the computers. Back on floor B1, wait for the guard to pass through the corridor, change weapons and take him down (activating the first person view). Don’t shoot him. Put away the weapon, grab it (square button) and drag it to the door to use it on the security system that requires retina scanning. Walk among the hostages and use the d.mic (triangle button) in their direction to find out who Agent Ames is. Attention: don’t do this close to the guard. During the animation, point the d.mic towards the figures to listen to the conversation. After receiving the LV3 card from Ames, quickly equip the AKS-7U weapon and stay still to avoid being discovered by Revolver Oncelot. After the animation, you will be discovered… But don’t worry, because the ninja comes to save you. Escape to Struct F and use the LV3 card to open the level 3 doors and get the PSG1 and RGB6 weapons. In Struct D, follow the walkway to Shell Core 2. Unfortunately, you cannot pass, as there are sensors and explosives scattered around the place. Use the pentazemin medication to relax and be able to better use the PSG1 weapon to destroy the devices identified by the blue light at the following points:
Device 1: About the passage you came from.
Devices 2 and 3: in front of you, below the stairs.
Device 4: In the tank after the ladder.
Device 5: next to the tank, on the floor.
Devices 6 and 7: On the wall on the other side of the walkway.
Device 8: Outside the walkway, hidden by a flock of pigeons.
Device 9: behind the flag.
Device 10: About the flying camera. Just hit the device, because if you hit the camera everything will explode.
Here comes the boss behind the entire criminal operation, Solidus Snake, Brother of Liquid and Solid Snake. After an exciting scene you will have to face the villain who will attack you using a plane. Grab the stinger gun that Snake throws to you and use it to hit the plane. Hide behind the tank to avoid shots and shoot when appropriate. With the walkway destroyed, continue hanging from the iron bar and fall onto the pipe. Be careful not to slip on the coconuts dumped by the doves. Run across the catwalk to avoid falling into the traps and jump over the railing to go down to the next catwalk. Jump over the hole and hang to get through the next hole. Arriving at Struct L, hide from the guards passing through the windows, lean against the wall and cross the hole. On the walkway jump over the hole to reach Shell Core 2. Avoid the electrified path. Enter the elevator and go down to floor B1. Dive down and find Nikita’s weapon in the flooded tunnel. Return to the upper floor. Climb onto the box with ammo and fire a missile into the ventilation duct. Control him to the room where the president is and destroy the panel in the right corner. With this, the electrified path will be deactivated and you will have free access. Receive the LV4 card and MO disk from the president. Return to floor B1, swim through the underwater corridor and open the door by moving the rotating valve. Go through the wreckage and open another door ahead. Vamp will appear to face you. Use the stinger weapon to take more energy from the vampire and hit him when he sinks to force him to surface. Don’t stay still for too long or he will stab you. After beating him, advance along another underwater path and open the cabinets to find Emma, Otacon’s sister. It is necessary to swim faster down the corridor as the girl has little breath. In the elevator hall, use the coolant to scare away the cockroaches and make way for the scared girl. Return to Struct L and destroy the flying cameras. Use the coolant to put out the fire on the walkway. You will receive Emma’s LV5 card. Go down the trapdoor and get ready to protect Emma from the enemies, using the PSG1 weapon. Equip the thermal goggles and note that there are mines planted on the path, shoot them to destroy them. Use the Psg1-T weapon to stun the guards on the structures ahead and destroy the flying cameras along the way. Be careful, on the trail to the last structure there are also mines. A new challenge arises: Vamp appears and takes the girl. The coward uses Emma as a human shield and you will have to hit him with your PSG1 whenever he moves the girl to the side. After eliminating him, go back and open the level 5 door to find the dg camera. You have 400 seconds to reach the basement of Shell Core 1. Hurry! Unpleasant news awaits you there.
ARSENAL GEAR
After being betrayed by someone you least expected, you will wake up trapped inside Arsenal gear. Many revelations and surprises will unfold during the conversation with your captors, Revolver Ocelot and Solidus Snake. Resist Solidus’ mind probe. After being released, run away naked and hide behind the boxes along the way. Don’t try to attack the soldiers, it’s a waste of time. At the end of the path, climb the ladder and sneak into the passage beyond. Wait in the tunnel until Solid Snake appears and hands over your equipment. As a gift you receive a powerful and sharp sword. You and Snake will be discovered by enemies. Take cover and blast them using machine guns. Advance little by little and only go through the door after defeating everyone. Help Snake destroy the dozens of guards that appear. Attention: don’t pay attention to the game over screen that appears twice – it’s just an attempt to trick you. Let Snake deal with Fortune and move on. After the conversation with Solidus, get ready to face a gang with several Metal Gear Rays. Their weak point is their head, use the stinger weapon to hit them. First hit them in the knee, and when they are down, hit them in the head. Now grab your bib and watch one of the most exciting animations in the history of video games. After all the blablablah, you will face Solidus and can only use your sword. To hit him, wait until he uses his tentacle or attacks with his swords, then dodge and take advantage of his open guard to counterattack. Repeat the process until you destroy it and enjoy the end of the best game in history.
![Revolution Arena [English Version]](https://revolutionarena.com/english/wp-content/uploads/sites/4/2024/07/Revolution-Arena-ISSN-2966-2117.png)


Facebook Comments